Making Probiotic Yogurt at Home
February 10, 2014
Yogurt is one of the best-known probiotic foods. Many well-known brands fill the supermarket shelves; however looking at the label can be a shock. Amongst all those sugars, flavors and preservatives, there are only two required ingredients: Milk and Starting Bacteria. Fortunately, a tasty and healthy yogurt can be easily made at home without all those unnecessary additives.
Making yogurt takes three easy steps: Scolding the milk, adding yogurt starter to the cooled milk, and then incubating the milk in a warm place to make the final yogurt. The result is a delicious product that you can eat with a smile, knowing that you have created something delicious and free of artificial sweeteners and preservatives.
Yogurt can be made either using the warmth of an oven, or using a yogurt maker. is inexpensive and comes complete with jars & lids.
The first step is heating the milk. This is best done in a double-boiler – do not heat the milk directly in a saucepan as it will overheat the milk, plus a pan that has been used to heat milk directly for 40 minutes is no fun to clean! If you do not have a double boiler, a 2-quart glass jug inside a large saucepan works just as well. The milk should be heated to 180 degrees F for 20 minutes for whole milk, 30-40 for low fat. A milk thermometer is useful here – if you don’t have one, look for small bubbles forming around the edge, but definitely do not boil the milk.
Next, allow the milk to cool to 110-115 degrees F before adding the yogurt starter – this cooling step is important since adding the starter to hot milk will kill the beneficial bacteria in the starter. If you don’t have a thermometer, then 110 degrees is roughly after 15 minutes of cooling and the milk feels very warm, but not hot to the touch.
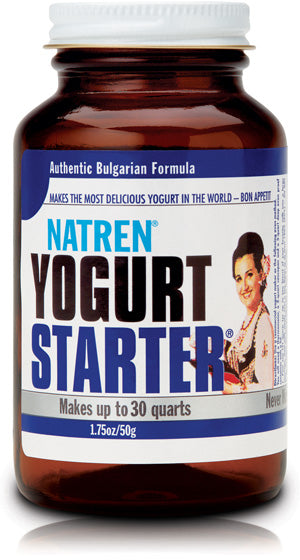
Next, in a separate cup or jug, mix 1-2 teaspoons of Natren yogurt starter into a couple of tablespoons of the cooled milk to make a smooth paste. Continue stirring in about a cup of the milk, then add that mixture back into your cooled milk and thoroughly stir. Although some people use a previous batch of yogurt as a starter, we advise against this because you have less control over the bacteria population that you are adding, plus adding a solid yogurt to your milk as a starter can make it difficult to achieve a smooth, non-lumpy yogurt. Yogurt starter is not expensive, so cost should not be a factor.
The mixture is now ready for incubation. If you are using a yogurt maker, pour into jars and incubate for 9-10 hours. If using an oven, place the covered mixture in the oven overnight (note: oven should not be on – it is there to provide a warm environment with a stable temperature). Leave overnight, or until the yogurt is firm and separates from the container.
Finally, the yogurt should be refrigerated. After about 3 hours you will have delicious homemade yogurt to enjoy. Eat it on its own, or sweetened with honey or fruit. Because homemade yogurt is naturally less sweet than store-bought varieties, it can also be used as a healthy alternative to sour cream in recipes.
if you want to make a true probiotic yogurt you can spike with Natren’s dairy powdered probiotics such as Megadophilus or Bifido Factor just before you eat the yogurt. One half teaspoon of each can be stirred in to the yogurt just before you eat. Please note, do not stir the probiotic powders in the yogurt that you are storing in the refrigerator. You will destroy the added probiotics. Only add the powders before you eat.
We have a more detailed yogurt recipe here. Why not add a jar of Natren yogurt starter to your next Probiotics order? If you give it a try, please let us know on our Facebook page how it works out. Good luck!
The post Making Probiotic Yogurt at Home appeared first on Natren Probiotics Blog.


Leave a comment